Tips and Tools for Canning
All you really need for canning is a wide pan, a large pot, and a jar lifter. This is oversimplifying a bit, but it is true that you don’t need a lot of specialized equipment to make good preserves and pickles, and much of what you do need you probably already have.
Wide, 6 to 8 Quart Preserving Pan
This is the pan you put your jams, jellies, and other preserves in to cook them. It should be wide so that the liquid has the maximum surface area for quick evaporation as it boils. If you must use a deeper, narrower pot, it will take longer for the preserves to thicken, and the fruit may overcook a bit and break down more than is ideal. It will still taste delicious, though, and I’ve made plenty of very good preserves in a deep pot, so if you don’t have the perfect pan, don’t let that stop you.
Your preserving pan should hold 6 to 8 quarts—any smaller and you run the risk of sticky, super-hot preserves boiling over. Never fill the pan more than about one third, as some preserves will boil up more than you might expect. (Don’t even ask how I learned this.)
Finally, the pot should be nonreactive, because every preserve you’re going to put in it will be acidic. Nonreactive means, preferably, heavy bottomed stainless steel (shiny) or enameled cast iron (opaque white or cream). Don’t use aluminum, which can darken your preserves and impart an off taste. Some books recommend copper preserving pans, which conduct heat very well, but those will react with the acids in any fruit left in the pan for very long, so I’d avoid them.
The preserving pan I used to test all of these recipes is a 6-inch-tall, 9½-inch-diameter Vollrath 7-quart stainless-steel pot, with a very thick, heavy base and stainless-steel handles that only rarely get too hot to touch. It has a mirror finish that’s easy to clean and the heavy bottom heats evenly, so preserves don’t stick or burn (unless I forget to stir them). It set me back sixty-six dollars at a restaurant-supply store, and it has been well worth the expense. Cheaper pots will do fine, of course, but if they’re lightweight, beware of hot spots and stir vigilantly to keep your preserves from burning.
Big Pot for Boiling-Water-Bath Canning
In just about any hardware store or big-box emporium you can find one of those huge blue- or black-and white- speckled enamelware pots with a rack that fits inside to hold jars, but for most of the recipes in this book you don’t need one, and in fact I use mine only when I’m canning batches of more than four or five pint jars.
Instead, I use an 8 1/2 inch tall, 9 inch diameter Lincoln Wear-Ever (read: inexpensive) aluminum 9 quart stock pot with a mismatched lid, and a rack made out of extra jar lid rings that I’ve lashed together with little pieces of kitchen string (if you have a round stainless-steel cooling rack or trivet that fits in the bottom of the pot, that would be even better than jar lids). You don’t need a rack that you can lift up and down and hook onto the sides of the pot, like the ones that come with dedicated canning pots; it’s fine just to put the jars directly in the water on a rack on the bottom of the pot.
I can fit three standard quart jars, four pint jars, six half-pint jars, or seven 4-ounce jars in it, and various combinations of sizes. This smallish pot requires less water—and thus less heating time and energy—than those monster enamelware pots, and the stay-in-place rack is much easier to use than the awkward rack that comes with most canning pots.
The pot you use must be deep enough so that water will cover your filled jars by at least an inch, apartment in Manhattan, I would water-bath my filled cans in a stock pot so short that when the water was deep enough to cover the lids of the jars it came to the very top of the pot, which meant I had to watch it every second so that it wouldn’t splash over and extinguish the gas flame. I don’t recommend this. It’s unsafe in myriad ways.
Candy Thermometer
Any kind will do for jam and jelly making, but after you’ve made a few batches you probably won’t even need it. Before you use it for the first time, put the tip in water at a full rolling boil and take the reading. If it’s not 212°F, the temperature at which water boils at sea level, note how many degrees off it is, and take that into account as you follow a recipe. Jelly cooked to 8°F above the boiling temperature of water will gel, so, for example, if your thermometer reads 208°F at boiling, your jelly will be ready at 216°F rather than 220°F at sea level.
For pasteurizing cucumber pickles, in which the water in the canning pot is maintained at 180°F for 30 minutes, you’ll definitely need a thermometer— the water gives no outward signs that it’s at that temperature.
Scale
In the canning and preserving recipes here, where it’s important that you use precise quantities (not only for safety but also so your preserves taste and look the way I’ve so evocatively described them), I’ve listed amounts for the main fruit or vegetable by weight rather than by volume. One person (say, my mom) can dice 3 pounds of strawberries and end up with 10 cups, while another person (me) can do it and get 9 cups. And one person can pick 5 oranges off their tree to get 3 pounds, then go next door and have to steal 7 of the neighbor’s oranges to get 3 pounds.
It just makes more sense to weigh these things, and for that you’ll need a scale. Of course, if you’re buying your produce at a place where there are scales, you can just keep track of how much you buy and calculate from there to determine how much of it you’ll need for a particular recipe. The weights I provide are for uncut fruit.
Jar Lifter
For a long time, I just used a pair of stainless-steel tongs with rubber bands wrapped around the ends to move the hot jars around. This works fine, but certainly not as well as a tool specifically designed to lift jars. For my part, the recent purchase of a jar lifter has made me a happier and more content individual, and I’d highly recommend you make the three-dollar investment yourself. You can find jar lifters in hardware stores and big-box stores that stock canning supplies. Note that if you’re using Weck jars, you might consider getting one of the Weck jar lifters that fit them just right.
Wide-Mouth Funnel and Strainer
Funnels, too, are sold wherever you can buy canning supplies, and it’s another tool I did without for a long time. It’s not absolutely necessary, but like a jar lifter, it will make your canning adventures brighter and more cheerful. Very-fine-mesh sieve, bouillon strainer, or jelly bag: You’ll need one of these only if you’re making jelly or juice.
I use a lower-end bouillon strainer, which looks like a conical colander or chinois made of an extremely fine wire mesh that keeps all but the tiniest bits from draining through. I got it at a restaurant-supply store for around twenty-five dollars— not cheap, but it’s made a huge difference in the ease with which I can now drain cooked fruit to get juice for jelly.
Just set it over a deep bowl (I prop mine up between two chairs, and position the bowl on the floor underneath it), pour in the cooked fruit, and let it sit. You can stir the fruit gently to speed up the draining, but don’t press so hard as to push any solids through. The strainer works just as well as a jelly bag and is easier to use and clean.
If you use a jelly bag, hang it on a dowel or broom handle and suspend it (between two chairs again) over a deep bowl, then carefully ladle in the fruit and liquid. Let it hang and drip for at least half an hour, and don’t squeeze it if you plan to enter that jelly in the county fair, where the good judges tend to frown upon cloudy product.
I’ve actually never seen a jelly bag for sale in a brick-and-mortar operation, so I sewed my own out of four layers of cheesecloth—I bound the seams and top opening with bias tape to keep the little bits of cheesecloth thread contained. The one I made is too small to be of much use; if you make one yourself, make sure it’s nice and big.
Other Tools
You’ll need a wooden spoon or heatproof spatula for stirring the preserves, a chopstick or thin plastic spatula for removing air bubbles when you fill the jars, a small heatproof container to put the jar lids and boiling water in, and a ladle (or measuring cup) for scooping preserves into jars.
If you’re making long-fermented pickles, nuka, or sauerkraut, you’ll need a crock or other nonreactive container big enough to hold the vegetables submerged in brine. Don’t use very old stoneware crocks, as the glaze could contain lead. I’ve seen new food-safe crocks at hardware and kitchenware stores, but if you rummage around in your cupboard you’ll probably come across something you can use. My best sauerkraut-fermenting vessel, for example, is a plastic bucket that originally contained seven pounds of rendered duck fat (don’t ask).
Canning Jars, New Lids, and Metal Rings (Screw Bands)
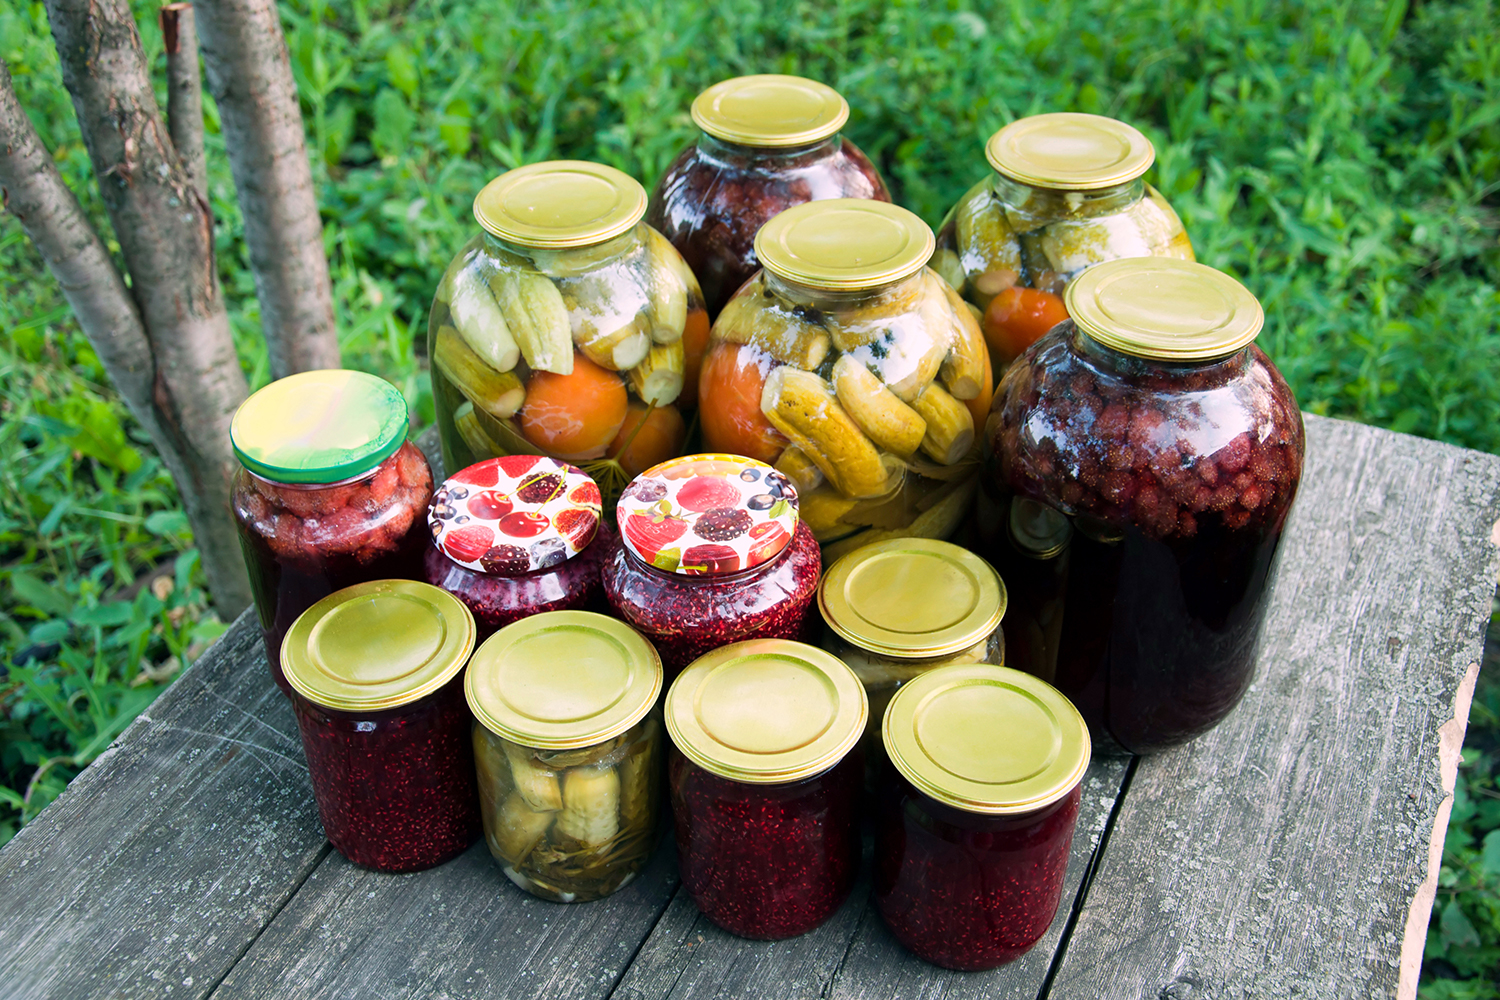
I use almost exclusively Ball, Kerr, and Mason canning jars with two-piece lids—that is, jars specifically designed for home canning, with flat dome-style lids that are held in place during processing by metal rings. The jars are sturdy and made to withstand the heat of processing. (I’ve poured fully boiling water into room-temperature canning jars without incident, and have never had one break in the pot — or, come to think of it, anywhere.)
Do not use old mayonnaise or other jars if you intend to process in boiling water. It’s always a good idea to heat glass jars by submerging in hot water before adding hot liquids or preserves.
Canning-jar lids are coated on the underside to resist corrosion from the acidic foods inside, and the underside has a ring of rubberized sealing compound around the edge, which is what adheres to the jar rim. Use brand-new, clean flat lids every time; they’re cheap and are sold separate from the jars, in little boxes. Don’t reuse previously sealed lids, as the sealing compound has been compromised. The screw-band rings come with new jars and are reusable.
